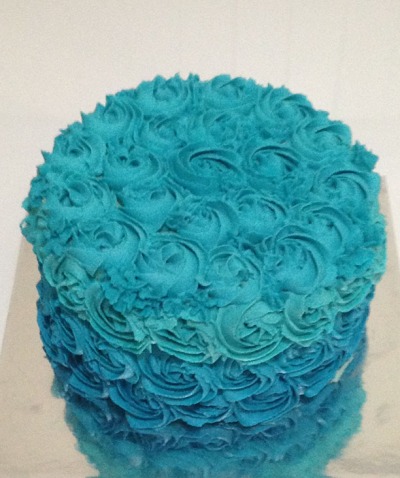
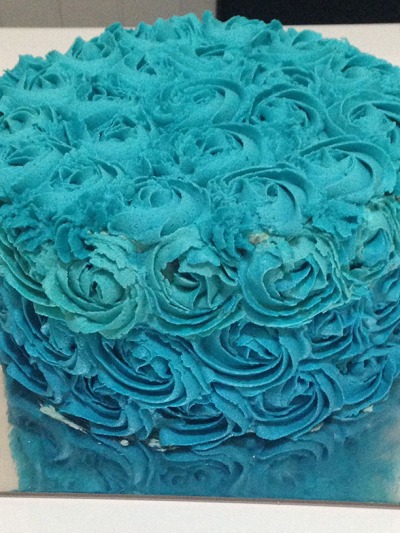
Today’s cake is an ombre roses cake, though the ombre is very slight but more on that later. As the title suggests they didn’t want to cut it cause it was too pretty! but what’s the use in having your cake and not eating it too! right? I’ve gotta say that while it is an easy way to decorate a cake it does look really good. I could sit and pick it to pieces but I think I’m learning to appreciate that this was my first attempt and it wont be perfect. It is a new skill to work with and with practice it will get better.
For those of you who would like to give it a try here is how I did it.
Step 1 – Bake a cake or 2.
It really doesn’t matter what sort though you will want to cut and tort it if you only bake 1 because you need the height to give the ombre space to develop. I used 2 because my recipe does that.
Step 2 – Make the icing.
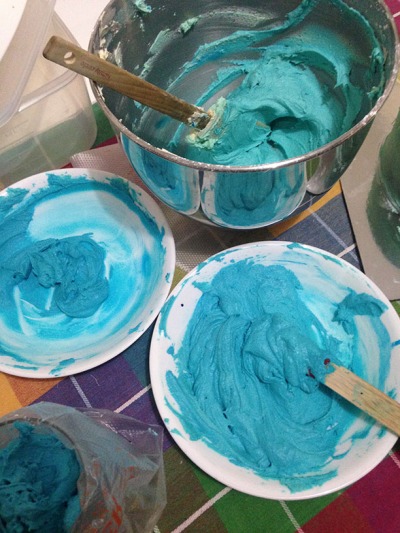
I use a 2:1 ratio of icing sugar to butter only because it’s easier and it works. In Australia sticks of butter are 250g and you can by icing sugar in 500g bags. No fuss lotsa mess! well it is with me in the kitchen anyway. I use about a teaspoon or so of vanilla and adjust the consistency with a splash of milk.The next job is to separate the icing into the number of colours you will use in your ombre.
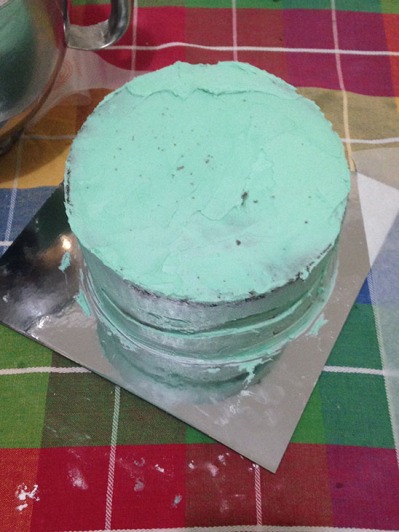
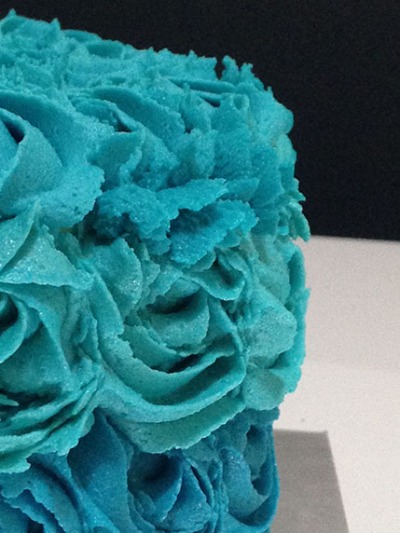
So “Ombre” for those who don’t know is the gradual shading changes in a colour. This is where my cake failed a little bit. I don’t have very many gel colours in my cake box, it is mostly liquids so it’s difficult to get the obvious tonal change without super saturating you icing which then makes them separate. Because I use butter and this icing is blue it turns green before it turns blue as you can see from the crumb coat, so it seemed like I used a lot of the food colour to get a blue then a lot more to make it darker. Sitting here as I write I just thought, why not add a drop of black or a teaspoon of cocoa powder? Oh well maybe next time. The other option is to buy different shade gels but i’m not set up for that.
I started with 3 colours I split the icing effectively into 4 parts 2 parts for the lightest shade and 1 part each for the others.
Step 3 – Crumb Coat
The crumb coat is basically the layer between the cake and the decorative icing on your cake and is used to catch any crumbs so they don’t blemish the outer layer. In this cake it also helps adding colour behind any gaps in the roses.
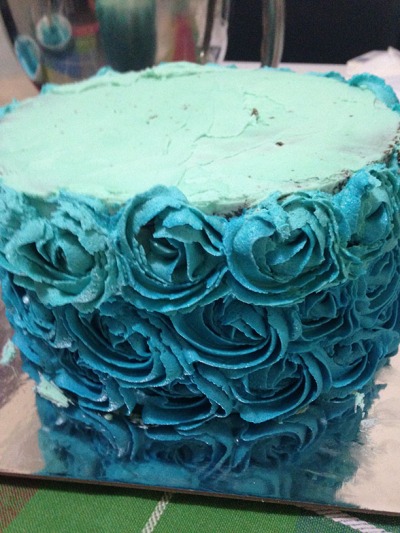
Step 4 – Side Roses
It takes a bit of practice to get the shape of the roses right and it helps to have a couple of trial runs on a piece of baking paper first. You-tube is the best place to learn the technique as it’s a bit hard explain in words but my very un-technical explanation would be. Start with a blob and then pipe an “e” around it but you really are better off watching a video. With a 1M tip and your darkest colour, start at the bottom of the cake and work all the way around the cake. Take the next colour and starting offset to the first rose work your way around. Continue working up with the next colour till you get all the way to the top.
Step 5 – Pipe the top.
If you did your maths right you should have enough of you lightest colour to do the crumb coat and the roses on the top. I didn’t so I combined the leftover of the second lightest with the lightest and created a fourth colour slightly darker than the top row on the side. Still looked cool and just means I have to make another one and do it right.
If you take a close look at the edge of the cake I have piped little stars just to fill in the bigger gaps of the boarder and that’s the job done.
This is a really effective, elegant style of cake decorating but also really easy to do. You can use as many different shades or even colours that you like as well as any size tip too. The next time I do a roses cake I think I’ll use a smaller tip making the roses more compact and some different colours just to make it fun!
Well that’s a wrap until the next time !
Thanks for Readin’


Hee Hee,
I look through your list of cakes and I say to myselfate that one..ate that one! And they were all amazing:) And the best part is, Matt has no idea that I¹ve eaten any of them!!!!
Thank you once again for making our week special with another special cake:) It really makes our day, you should hear us!
Thank you again for all you doAnd Rachel for being the deliverer of such cakes. You always patiently put up with us as we munch away and you are so good that you resist. I wish I had your strength!!
LikeLike
Hi Michelle,
Thanks for the comments it’s great to get feedback.
Thanks again
Mike
LikeLike