Well where do I start, I had a Birthday Cake to make for the staffroom this week as well as being my sons 8th Birthday on Friday and we have Mother’s Day on Sunday which has all followed Nan’s 90th last weekend.
I decided to make a Death by Chocolate cake because I know the birthday girl loves chocolate, though she was very polite and graciously accepted when I suggested I make her a carrot cake. Hehe!!
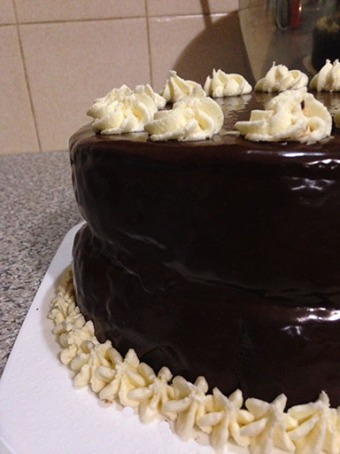
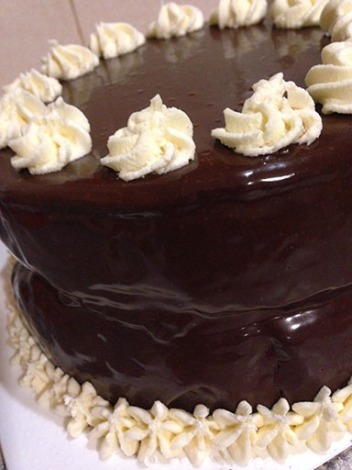
I’ve had a chocolate cake recipe waiting to try for a while and this gave me the chance to try it out. It was enough batter to make 2 x 8” rounds and I filled it with a white chocolate buttercream and covered it in ganache. Sounds good doesn’t it! Like the great Noob food blogger that I am, I’m still learning that a pictures worth a thousand words and to take photos during the process.
Sounds great so what went wrong?
Everything was going swimmingly in the making of the batter. If anything I was probably better prepared than ever before. Maybe this practice thing really does work! Greased my tins and the oven was preheating. My first issue is I have an 8” cake tin and an 8” spring form tin but not 2 of the same so how differently were they going to bake? We’ll that’s easy as Gretchen Price from woodlandbakeryblog.com has taught me “they’re done when they’re done!”. As it turns out there really wasn’t any difference in the baking time which is nice to know.
The next part is where my brain broke (insert sad face emoji) once they were cooked (took about 45min) I brought them out of the oven and sat them on the cooling rack in their tins for about 10 minutes to cool before turning them out. This is when the two different tin sizes caused a problem; I couldn’t turn them out at the same time. I could turn the first one the way I always do by sandwiching the tin between two cooling racks back and forth but how was I going to do the second one? Obviously at 10:30 at night rational thoughts were not present and instead of using a plate or something with a broad surface area I grabbed a palette knife and tried to balance a freshly baked piping hot cake on it! DERRRR!! What happened next? It broke in half and I swore ALOT!
OH NO! What did you do?
Well, after I finished swearing and telling myself what an idiot I am, I put the pieces of cake back into the shape it should have been as best I could. I covered them over to cool and went to bed. It was now tomorrow’s problem.
Thankfully I was not the first person to have a brain fart nor will I be the last I’m guessing. Maybe this blog can save someone else’s cake like the numerous blogs I read to save my own. The answer is? Glue it back together.
How to glue a cake back together
The beauty is this is a layer cake so I’ve got the glue. In this case, white chocolate buttercream. Yes it is going to look a bit odd when they cut through and see a big white vein of buttercream but if it saves the cake then it’s all good. You could always try and tint the glue so it’s not as obvious but as this is such a dark cake I didn’t bother. So if you’re reading this because you too have broken a cake this is what I did.
First put the pieces back together as gently as possible trying not to disturb too much of the crumb and put it in the fridge. This helps firm the cake up and is less crumbly when you glue it back together. Next mix up some buttercream to form the glue, if you want, you can try and tint it to match if you are really worried about it. Place your buttercream into a piping bag with a large round or flat tip or use it without a tip at all. If you don’t have a piping bag you can use a zip lock bag or even make one out of baking paper (google it). I don’t recommend using a knife or spatula as this drags across and will pick up the loose crumbs.
Put a generous coat to one side of the break then push the other part firmly back into position, the cold cake will stand up to a bit of pressure. The more dense the cake the more pressure you can use obviously. Continue this until all the parts of the puzzle are back in place. Build up any area that is missing or if there is lots of crumbs mix them together with the buttercream to fill the gaps. Disaster averted! Below you will see the join marked by the big red arrow.
On With the Masterpiece!
Now that the cake is one piece again it is best to be the bottom cake. It’s time to put the centre fill in, I still had the buttercream in the bag so I just piped it on but you can use whatever method you like to add the buttercream.
Then I wacked on the top layer and carefully transferred it back to the cooling rack where I covered it in ganache.
Once the cake was fully covered I popped in in the fridge to set and prepared my piping bag with my 1M tip and more of my white chocolate buttercream. To finish off I just put a simple star boarder on the bottom and swirls on the top. In the end I was very proud of what I produced though it was far from perfect!
Things I learned along the way
I want to document things I learned along the way which often only experience can teach you. Maybe by reading what I’ve learned, it might help prevent you from needing to experience it or could just something for me to comeback too before I do it again.
Don’t break the cake – this is important but I now know I can fix it if I do and not to panic. But maybe stop and look at a better solution first.
Crumb coat to give the cake smooth even sides – I didn’t mention it in the main part but if you look at the pictures it’s obvious where the two layers of cake are. What I needed to do was to bring the buttercream out past the edges of the cake and blend it into the two layers so it had one continuous wall, even if I didn’t do the whole cake.
Stir the ganache gently to stop bubbles – At the start when incorporating the chocolate and the cream together it’s probably not too much of an issue but it seems I must have given it a good mix with the whisk before I poured it over the cake as there were tiny bubbles on the surface after it set.
Keep the piping tip off the cake surface – Piping 101 – By touching the tip onto the surface of the cake I was putting the ganache onto the buttercream . By no means a failure but a definite points deduction.
A picture is worth a thousand words – As a blogger who is trying to share the journey it’s important to include photos from the start and not just the finish especially if there is a disaster involved.
Use the good camera – IPhones are great but it’s hard to get a good photo on the fly (when I remember to take a photo at all). I find it has a very narrow depth of field on closer photos making half the photo out of focus. So I’m going to try and use the good camera and maybe plan for the blog before I start and think of the steps I might want to photograph.
Well I think that about wraps it up for my Death By Chocolate Cake, if you want the recipe I’ll chuck it in the recipes page at some stage.
But Wait! What’s the Verdict Doc?
The birthday girl liked the cake as you can tell by the big smile on her face in the picture below (the King Julian face is a bit of an in joke between us!)
The feedback on the cake was that it was very rich! And did slow everybody up a little more than usual but a Death by Chocolate cake is very indulgent so you would hope it would.
Thanks to all my likers and growing number of followers, feel free to share my posts around with friends and family if you think they’d enjoy the read.
Thanks for Readin’


Still looks amazing no matter what happened during the process! Well done!
LikeLike
Thanks, I can be very self critical but I’m proud of what I’d made & I can identify what I’ve done wrong which will help create something better next time.
LikeLiked by 1 person
Happens to us all at some point, I promise. Looked delicious to me though 😃
LikeLike
Thanks for the feedback, the more I look at it the happier I am with the results. it’s all part of learning
LikeLiked by 1 person